Thursday, October 31, 2013

Templates are back!

I know it's been ages since I've given away a template.  It was my intention to try to give one away every week this year. Clearly, that hasn't worked out.  I really would like to get back to doing more templates, so I'm starting again this week.

There are tons of templates out there that replicate the look of pocket pages, but none of the templates I've given away on my blog so far have been in that style.  That changes today.  Since I don't usually do digi layouts in this style, I approached it like a collage, keeping the major components at 3x4 and 4x6.  This is what I came up with


Once the major elements were in place, I just filled in the spaces left over with squares or rectangles.  Once the template was set up, I went to my newest digi supplies and found the Arizona Autumn kit from Gina Cabrera.  I'm not into a lot of the Native American motifs that have become so trendy, but I really like how they were done in this kit. 

I loved using Arizona Autumn to make this layout about a birthday party I attended last weekend with my girls.


What do you think?  If you'd like the template, you can download it here, and you can find some more of my templates for sale in my Etsy Shop.

Monday, October 28, 2013

No more hoarding--check in

I was going back over some of the posts I wrote in the first month of this blog today to see what goals I had for myself at the beginning of the year and whether or not I followed through. I have been really determined to use up my stash this year.  I started two big family history projects (one for me and one for my husband), joined 3 design teams, completed my first LOAD, attended True Scrap 5, and started making cards.  

In the No more hoarding post.  I shared two of the first cards that I ever made.  Let me just say that I'm more than a little embarrassed to look at them now.
It's not that there's anything wrong with them per se, but the distressing isn't really my style, there aren't many layers, and the composition of the first one is a bit bizzare--I'm really not sure what I was thinking with that one (I think I even actually sent it to somebody. Yikes!)  I think I've definitely improved as a cardmaker since those first projects.  Here are some recent ones I did with the 3 Scrappy Boys April 2013 Add on kit.


How's that for improvement!?!  I'm going to call my goal of making cards accomplished, and I think there are a lot more cards in my future.  The big question is, "Did I stop hoarding?" I think the answer is yes.  I started out the year looking at my stash, thinking that I had plenty and shouldn't need to buy more for a long time.  It's true that there was a lot there, but there were plenty of things that I either wouldn't or couldn't ever use.  In May, for the first time since I started scrapbooking in 2005, I purged my stash.  I was ruthless in my purging.  If I didn't love it, it was gone.  At our NSD event, I gave some of it to my scrappy buddies, and the rest was donated to the local library.  It is so much easier to get projects finished now that I don't have to wade through all of those supplies that I don't love.  I have made quite a few scrappy purchases this year, but the stash is definitely smaller than when I started the year, I have hundreds more layouts, and a ton of cards (I've even sold a few!)

I'm happier with my crafting than I've ever been.  I would really encourage you to look at your stash, and think about what you use (or don't), and how to get more of your supplies out of storage and onto projects.

If you're dying for some more, I also have a post up on the blog at 3 Scrappy Boys today about getting your family on board with your scrapbooking.

Happy Scrapping!

Thursday, October 24, 2013

CKCB: October Blog Hop

Welcome to My Rainbow Coalition!  This is the third stop on the CKCB Members' Blog Hop for October. You should have come here from Recklinghausen Musings, Lisa Hausmann's blog of her crafty goodness.

While you're here, take a second to enter to win a 20-page custom scrapbook project from my scrap-for-hire site www.ScrappingTheRainbow.com using the Rafflecopter widget at the bottom of this post.  (Make sure to click the green buttons to claim your entries.)

This month's challenge was to make something with your kit that was inspired by a piece of your jewlery.  My kit this month was called "Hey! I know her!"  because I found out on the first day of October that my friend Stacy was the guest designer for the month at CKCB.
With this challenge in mind, I stepped into my closet to look at my jewlery, and I saw these earrings hooked to an egg-shaped candle holder, and I knew that they would be the inspiration for my project.

I decided to make a holiday card. This was my first time using my new hexagon squeeze punch and my glossy accents.  Those are both going to be go-to elements in my stash from now on! I also used a Martha Stewart border punch that reminded me of the pattern in the egg. I'm pretty happy with how the card turned out.  What do you think?


Thanks for stopping by! Your next stop on the hop is with Lesley at Oh, Blog It If You Can't Beat Them 

Here is the full blog hop list, but it will also be published on the CKCB so if you get lost along the way, head over there to find your way back onto the hop.

Don't forget to enter the giveaway before you go.  Happy hopping!


Wednesday, October 23, 2013

3 Scrappy Boys: Process Video #2

I have a new process video up on my YouTube channel today.  No sleep last night means not much else to share, but I hope you enjoy!

While you're here, enter the giveaway at the bottom of the page for a 20-page custom scrapbook project.  It will make a great Christmas present for an important person in your life.


a Rafflecopter giveaway


Monday, October 21, 2013

3 Scrappy Boys: Still Using My Trio Kit


I've been having a ton of fun working with my Trio Kit this month!  I've never worked much with prepackaged kits before, but it's been really nice that someone else has done the work of choosing the supplies for me.  At the same time, I love a good challenge, so I've challenged myself to use up every bit of the kit that I possibly could.  These cards are some of the projects that I put together as I got towards the end of the kit.


Today, on the blog at 3 Scrappy Boys I've issued a challenge to use up your scraps, and shared some more of the projects I made with my kit.  


I've shared ALL of the projects that I made with my October 3 Scrappy Boys Trio kit in my Kit Killer Video.  If this inspires you to go back into your scraps, come share the projects you make in the gallery at 3 Scrappy Boys to enter the challenge.  Good Luck!

While you're here, enter my give away for a 20 Page custom scrapbook project that will make an excellent Christmas present without adding to your holiday TO DO list.

Saturday, October 19, 2013

Simple Sketches #8: Dog Pile & Conversations with Lilah

It's fabulous to watch how a 2-year-old mind works and to attempt to mold it. Every once in a while, I find myself in a conversation with my little people that is both hilarious and heart-breaking.  Yesterday I had one of those. Brooke and Jordan were over for the day, which is always fodder for a funny story.

Conversations at the church that my sister and the twins go to have a bit more emphasis on the Holy Ghost than the churches I grew up in.  Since they're only 3, the twins have put together from TV and general observations that ghosts are supposed to be scary, so the Holy Ghost must be scary too. That led to the following conversation yesterday.

Brooke: The Holy Ghost is here!
Jordan: The Holy Ghost is scary!
Twins together: I'm scared!
Me: Don't be scared.  The Holy Ghost isn't scary. The Holy Ghost is nice.
Lilah:  The Holy Ghost is nice?
Me: Yes.
Lilah: I want to see the Holy Ghost.
Me: The Holy Ghost isn't really something you see.  It's more something that you feel.
Lilah: (crying)
Me: Sweetie, what's the matter?
Lilah (crying): I want you to show me the Holy Ghost.  I want to see it!
Me: Oh, Sweetie.  Don't cry. I'm sure you'll feel the Holy Ghost someday.

So funny, but it pulled at my heart at the same time!  Since we're on the subject of my lovely Lilah, I have a new layout to share using a sketch by Melissa over at Simple Sketches.  Here's the sketch

I love a good challenge. One of the things that I'm loving about being on the design team at Simple Sketches is that Melissa keeps pushing me outside my box.  For this sketch, I went digi.  I copied the sketch pretty much exactly because this was just a small thing that I wanted to get down quickly  
   Credit Amanda Heimann: Party Rockers Kit

I just love how Lilah is always right in the middle with the two of them.  It's great that they're all growing up so close.

Friday, October 18, 2013

Taking Stock


In a fit of organization brought on by my inability to find brown paper lunch bags, that I would have clearly seen if I had looked at the opposite side of my shelf...but I digress...I discovered that I have

6      in of 12" x 12" patterned paper
1.5   in of 8.5" x 11" cardstock
1      in of 12 x 12 cardstock
0.25 in of 8" x 8" patterned paper

2      74 ct pullups boxes (yep, that's how I quantify things at this stage of my life) of scraps (which includes all the chipboard I'm saving from packaging material)


Wednesday, October 16, 2013

Letterboxing: treasure hunting...with stamps!

I first learned about letterboxing on Elizabeth Kartchner's blog, she didn't say very much about it but she did liken it to treasure hunting and said that it involved stamps.  That was enough to intrigue me.  I've known about geocaching for a long time, but I haven't been able to get myself around to do it, partly because I'd have to carry around the little trinkets to do it, but a stamp and a little book would be easy to keep on me, and I wouldn't have to keep replenishing my supply.
Maggie was over for the weekend, so we decided to take on a letterboxing challenge on Monday. We did a little investigation, and saw that we were supposed to make our own stamp to leave behind.  All the sites say to carve it, but why have a silhouette if you can't use it for fun things like this? I'll do a better review of the Silhouette stamping material in a future post, but suffice it to say that you have to rig it a little to make it work well.  I did, and we had the cutest little seahorse stamp to start our adventure.  It's much cuter than the picture might indicate (it's stamped on canvas and I took that picture in the dark).

 While she was in the shower, I threw together a little book for us to collect our stamps in (because, really, why not?).  I used adhesive-backed canvas from Dear Lizzy (I thought it was fitting) to cover the chipboard for the cover and bound it with my bind-it-all, using regular typing paper for the pages.
We used http://www.letterboxing.org/ to find an interesting set of clues nearby to follow.  We found the Sugarloaf Mountain Dr. Sues Tribute Trail, and we were off.  The clues start at a trail head and they give clues to help you find all the hidden stamps.  They're usually hidden under rocks or in stumps.
I did get the chance to face one of my fears (if only on a very small scale).  While we were looking in the wrong place for the second stamp we found a little baby snake.  It was smaller than an earthworm. People who know me would probably think it's ridiculous that I own a snake, but I'm afraid of them...but it's the truth.  My snake is contained and harmless.  I'm afraid of snakes in their territory: wild and dangerous.  The little guy we found wasn't too scary though.  Unfortunately, by the time I got my camera settings right, he ran away...and I couldn't gin up enough courage to dig him up.  Oh, well.  Maggie was there to see him with me.
When you find the stamps, they have a booklet with them and they're all wrapped up in a ziploc and inside a tupperware container. 
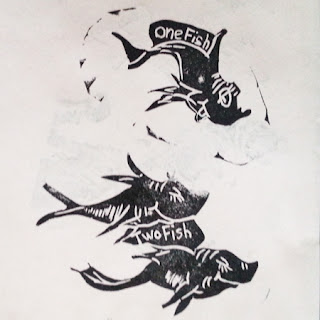
 The set of clues we followed were placed in 2005, and they were holding up well, but most were a bit damp from the recent rain.  The person who placed the stamps had carved beautiful copies of characters from Dr. Seuss books.


Here are some of the stamps other people have left over the years.


I just love that camera stamp, I might take it over into photoshop, and then into Silhouette Studio to make one of my own.  This trail included 6 caches, and we were able to find 5 of them.  We were out for about 3 hours, but try as we might, we just couldn't find Green Eggs and Ham.  Oh, well.  I can't wait to go look for my next letterbox.  This was beyond fun.  I think I'm really going to love doing this with my kids!

You should try it!  It's a fantastic time!  While you're here, though, you should use the widget below to enter to win a custom 20-page scrapbook project.  I'll have it delivered before Christmas, and it will be the perfect gift for someone special in your life!

a Rafflecopter giveaway

Monday, October 14, 2013

Mixed Media Play: Stencils and Modeling Paste, and Ink! Oh, my!

I've been watching the message boards to see what you all are looking for in terms of design team projects, and this week, it seems to be stencils.  There are a ton of things that you can do with stencils, and scrapbooking companies are coming out with amazingly cute designs to play with, but as I said in my post last week, my Silhouette really is my favorite toy.  So, of course, I made my own stencil.
Multi media stencil post001a

I've had this shape in my Silhouette Studio library for ages, but I haven't had a specific project to use it on, so today, I'm starting with the shape and challenging myself to make it work.  The first step in the process was to convert the shape from a card background to a stencil.  This was a fairly simple process, just removing a frame from the outside of the shape (this has already been done in the image above).
In a new Silhouette Studio file, I opened the shape and rotated it 90 degrees (just because that's how it will fit best on my stencil material).  
Multi media stencil post001
You can see in this image that there is a frame around the outside of the tree shape.  That's great if I wanted to use this for a card background, but since I want to use it as a stencil for mixed media work, I'd like more space around the edges of the image to be protected from my modeling paste, ink, and/or paint.  All that I have to do is to delete the extra frame.
First, select the image, right click, and select release compound path. All that this does is to tell the program to think of every closed shape within the image as its own separate cut (as opposed to part of a whole). 
Multi media stencil post002
For some images, you might be able to just delete the pieces you don't want at this point, but for this one (and most complex shapes that I've encountered) I also had to ungroup all of the cut shapes in the image (a choice in the same right click drop down menu). I selected the rectangle surrounding the tree image and deleted it.
Multi media stencil post003
Now, the image is ready to cut from plastic stencil material.  These are the settings I chose to cut the image.
Multi media stencil post006
Ok, I'm done talking about my Silhouette for the rest of this post.  I promise. Here's the stencil I made.
Ts51 007
Laying it down on the vanilla cardstock, I smoothed the modeling paste over the stencil.
Ts51 008
I lifted the stencil up right away, cleaned it off, and allowed the paste to dry. Once it's dry, apply a light layer of mod podge, or acrylic paint to seal the mod podge (I don't know that this step was necessary, but it still felt a bit fragile when it was dry, so I went ahead).
Ts51 012
Now, the background is ready to start building the layout.  I printed these 3 photos I took in September at Magic Kingdom, on my Polaroid POGO printer.
Ts51 011
They are 2x3 photos, but I figured that they were about the right size for an 8x8 page.  I wanted to add some color to the background, and I did so with fabric paint, October Afternoon sprinklers, and black stickles. I wanted to be able to drip the fabric paint and stickles, so I just watered them down, which worked just fine.
Ts51 017
Ts51 015
I know this looks really messy, but most of it will get covered up. I used This orange and black patterned paper to ground the photos and matted them with adheisive backed cork. I adhered the paper to the background with foam tape so that I didn't have to try to glue anything to the modeling paste.
Ts51 019
I decided that I would hide my journaling, not because it was private, just because I wanted to include that cute orange polka dotted pouch from Recollections.  For the rest of my embellishment, I used some brads and ribbon, I cut the back off the brad that would have had to go through the modeling paste with wire cutters and glued it (and the ribbon) down with Glossy Accents (I used glossy accents because I couldn't find my hot glue gun).  To finish it off, inked the edges with Distress ink. Here's the finished project.  I hope you like it! Ts51 001
I hope you will get out your artsy supplies.  Don't be afraid to use them on your layouts!

If you wanted the recipe for the modeling paste, here it is:
1 part acrylic paint
1/2 part glue
1 part baking soda (or any powder whose texture you like: maybe talcum powder or sand)

Mix it together and keep it in an airtight container.

While you're here, enter to win the giveaway from www.scrappingtherainbow.com

a Rafflecopter giveaway

Thursday, October 10, 2013

Creative Knockouts Challenge: Fall sponsored by Doodle Pantry


This week's challenge at Creative Knockouts is to make a project with the theme Happy Fall.  I know that I'm supposed to be the scrapbooker over there, but this week I've brought you a card.  It just doesn't feel like fall yet for me.  It's odd, I know it's October, but the weather has been pretty warm, and I haven't spent much time outside to see the changing leaves, so I haven't made that switch.  Since I'm still in a bit of a summery mindset, I haven't been doing any autumn activities with my family yet.  No fall activities = no fall pictures = a card for my challenge project this week.  Maybe you'll see a layout next week.

Now that I'm done with that tangent, let me introduce you to this week's sponsor Doodle Pantry.  They have a ton of adorable images in their store.  I work better with inanimate objects than people and animals, so I chose a collection of fall leaves that they have in the store called "Lively Leaves"  it comes with 5 separate images of leaves, several leaf clusters, and 4 fall themed sentiments.  I decided to print my 3 favorite leaves and color them with my Derwent watercolor pencils, blending with water and distressing the edges with Distress Ink.

I used papers from my October Counterfeit Kit to make this card, just adding the button, embroidery floss, and metal accents from my stash.

I hope you like the card. Let me know what you think!  While you're here, use the Rafflecopter widget below to enter a giveaway for a custom 20-page scrapbook project from my scrap 4 hire site www.ScrappingTheRainbow.com.

a Rafflecopter giveaway

Tuesday, October 8, 2013

Simple Sketches: Sketch #6 and a VIDEO!

Hi everybody!  I just wanted to share with you that there's another sketch up at SimpleSketches

I really responded to this sketch immediately when I saw it.  I love the clean, linear style, and it made me want to scrap immediately.  Whenever I get that sudden urge to get an idea out of my head, I always go digi.  Doing a layout in digi means that it can come together quickly, but also that I don't have to worry about getting out and putting away all of my supplies.

This is the layout I made
Thanks to Melissa at Simple Sketches for another great sketch!The kit that I used for this project is from, Sara Gleason and it's called Coconut Tree. If you're interested in the process I used to put this layout together, watch the video.  While you're here, use the Rafflecopter widget below to enter to win a 20 page custom scrapbook project I'm giving away on my scrap 4 hire and classes site www.ScrappingTheRainbow.com


Monday, October 7, 2013

Fun with Silhouette: Making Embossing Folders

I've been eyeing the Texture Boutique dry embossing machine for longer than I care to admit, but at Michael's and Joann's, it was always a little bit more than I could justify spending on another tool that would require accessories and encourage more hoarding.  When I went to Hobby Lobby for the first time in at least a decade last month, they were having a sale that, when combined with a coupon made it worth the investment for me ($18).  I got a few embossing folders, and I loved them so much that I began to realize I was in real danger of becoming addicted to yet another crafty supply.

Looking closely at the embossing folders, it seemed like there should be an easy way to make them.  Like any enterprising crafter, I took to YouTube.  I found a video showing how to make them by cutting shapes out of cereal boxes and gluing those down to another piece of chipboard.  You then seal it by modpodging over the whole thing.  I decided to try, but I had a couple of problems with the technique I saw.

First, I haven't been embossing for very long, but all my folders are, well....FOLDERS.  I thought that if I was going to make them I'd like them to be as close to the real thing as possible, so I wanted them to have two sides with the cut out on one side and the raised image on the other.

The second problem was that she did all the cutting by hand.  That sounded like an awful idea.  As a matter of fact, she had to stop several times during her video so that she could rest her hands.  This was a project screaming for a Silhouette if I ever saw one.

Cards with polka dot textures have been calling my name, but the polka dot embossing folders weren't on sale, so I decided to make one of my own. I opened up a new Silhouette Studio file, and drew a rectangle slightly larger than an A2 card, and duplicated it so that I would have both sides of the folder.  Then I used the eliptical tool to draw circles, spacing and aligning them using the software.

Once I set up the file, I cut it out of chipboard.  This was VERY thin chipboard from the back of a pack of patterned paper.  It is a little thicker than a cereal box, but only a little.  These are the settings I used, with the exception that I used a blade setting of 7 instead of 5 (and if I had it to do over again I would use 8).

The tedious part came next.  I had to poke all the dots out of the A side 


and glue them to the B side, using the A side as a template.


Once that was done, I layered a thin coat of Elmer's school glue on top of side B to seal down the raised dots. (I clipped it to a scrap piece of chip board so that it wouldn't warp from the moisture in the glue).


  Then, I waited...and waited...and waited. I wanted it to be completely dry before I started to work with it.

I ran the stack through the machine once,
and I discovered that my folder wasn't as thick as the store-bought ones, so I had to add some more thickness to my stack.  (Those are just some pieces of an educational toy set that I stole from my daughters.)

When I ran the stack through the machine again, this is what I got

Ok, so it's not perfect, but it's not bad for a first try.  I think I am going to keep this folder because I think the distressed edges on the circles could be perfect for some projects.

I just wanted to recap with a few lessons learned.
1. This procedure definitely works, but the size of the circles was really too small, which made this design too tedious to be worth the effort.  Stick to larger patterns or ones that have all of the smaller areas attached to larger pieces.
2.  The chipboard on paper packs is thicker than Silhouette brand chipboard, and requires a deeper blade setting.
3. Make sure to weigh down your folder during the Mod Podge phase so that it doesn't warp.
4. This chipboard wasn't thick enough to emboss with the Texture Boutique stack, so you need an extra 1-1.5 mm of thickness.
5. The extra pieces you add to the stack should be smooth, or they will make an impression on the back of your card.

Go forth and EMBOSS!

Tuesday, October 1, 2013

October Counterfeit Kit Challenge: Hey! I know her!

It was a rough night around here at the Reyes household.  Alfred and I were up late trying to figure out whether or not congress was going to get it together so he could just go to work and do his job, and then both kids decided that they were fully rested and ready to go at 4 am!  I can't say that I was on the same page, but if they're awake, I have to be awake too.  Before anything else, I checked to see what this month's inspiration kit is over at the Counterfeit Kit Challenge Blog (it's the first of the month, I've been waiting to see what's in store for days), and what did I see!?!  My friend Stacy!

I met Stacy earlier this year when I started a papercrafting meetup in my home town.  It was pretty awesome to see her face when I pulled up CKC this morning, and it inspired me to get started right away.  The inspiration kits for this month were Cocoa Daisy's September kits.  I chose the main kit to counterfeit.
The first thing that I noticed about this kit was that I have many of the embellies in my Silhouette Studio library. I have all the shapes from the Echo Park sticker sheet, and I also have several Viewmaster and filmstrip shapes, so I decided that I would make all my embellishments this month, so that left just the paper.   I don't have very much bright white in my stash right now, so my kit is more of a cream base.  Here's my kit. In honor of Stacy, I'm calling it "Hey! I know her!"

I started with the floral paper from Crate Paper and chose papers that pulled in the colors from the floral paper.  I think it's going to be a really fun kit to use. Let's see those challenges ladies!